

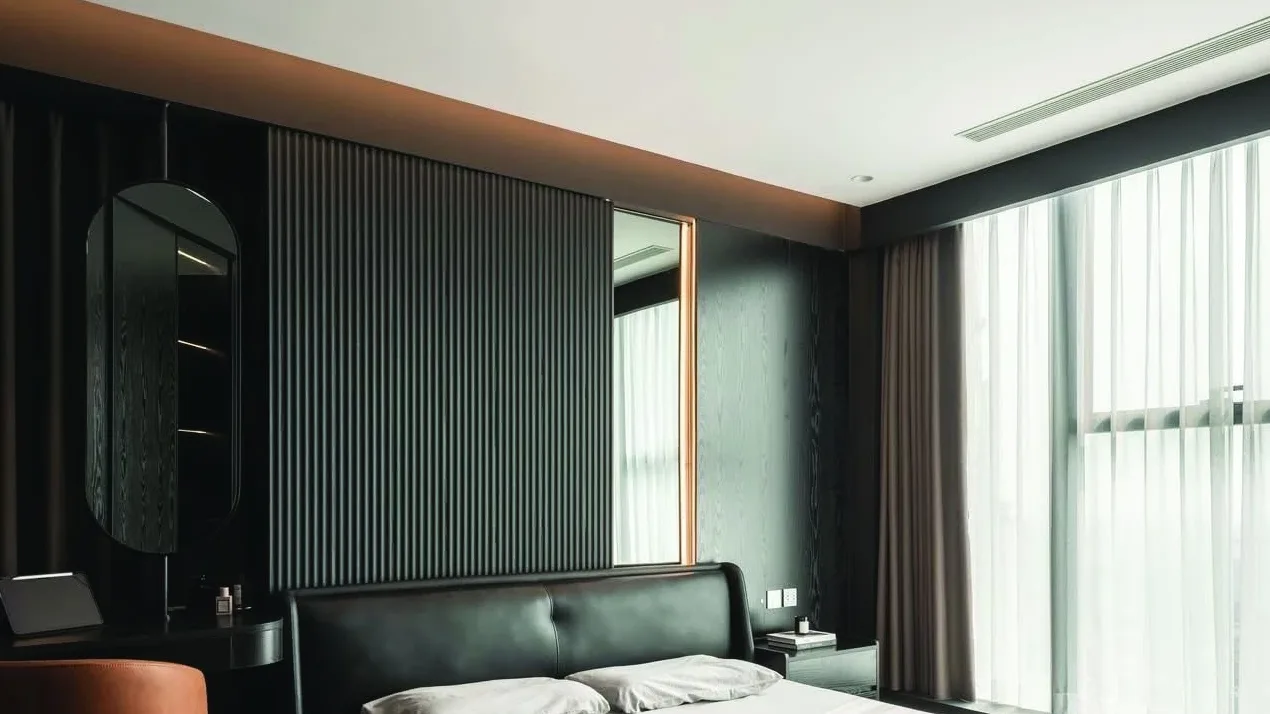
Fluted wall panel design is a proportion problem before it is a product choice. Pitch, depth, orientation and light position do more to a room than the finish code does. All four should settle before anyone opens a sample book.
So this guide works through the decisions a designer actually makes. How much wall to clad, which way the run goes, how the lighting answers the profile, and where the scheme should stop. It assumes you already know what the product is. If not, our guide to what PVC fluted wall panels are covers geometry and structure first.
We extrude these profiles, so the advice here comes from seeing what arrives on site as well as what looks good on a board.
Fluted wall panel design starts with the room
A fluted surface adds visual activity. That is its purpose, and it is also why the room has to be able to absorb it.
Look first at how much of the space is already working. A room with patterned flooring, open shelving and strong joinery needs no further texture competing for attention. A room with plain walls, quiet floors and simple furniture usually does. The panel is a tool for adding interest where interest is missing, rather than a finish applied everywhere by default.
Ceiling height sets the second constraint. Below about 2.5 m, deep profiles start to feel heavy because the shadow lines read as a solid dark mass rather than as rhythm. Above 3 m, a shallow profile can disappear altogether at normal viewing distance. Match the relief to the volume, not to the mood board.
Viewing distance matters just as much. A wall people pass at arm’s length shows every detail of the groove floor. A wall seen from six metres reads only as tone. Reception desks and corridors sit in the first category, and double-height lobbies sit firmly in the second.
Choosing pitch and depth for the space
Pitch is the distance from one groove to the next, and depth is how far the face stands above the groove floor. Together they decide whether the wall reads as texture or as relief.
Our own range gives four combinations. The 5-groove boards place a line every 41 mm across a 205 mm face, so the rhythm is fine and busy. The 3-groove boards space them every 65 mm across 195 mm, which reads calmer and carries further across a room. Depth then splits each pair: 12 mm and 15 mm in the low profiles, 22 mm and 27 mm in the deep ones.
A useful rule of thumb is to widen the pitch as the wall gets bigger. A fine 41 mm rhythm across an eight-metre lobby wall turns into visual noise, while the same profile behind a reception desk reads as precision. Conversely a 65 mm pitch on a narrow return between two doors can look like three random lines rather than a pattern.
Depth then follows the light, which is the subject of its own section below. Where the two conflict, depth should win on a wall that gets grazing light and pitch should win on a wall that does not.
Orientation: what a vertical or horizontal run does
Rotating the same board ninety degrees changes the room more than most people expect.
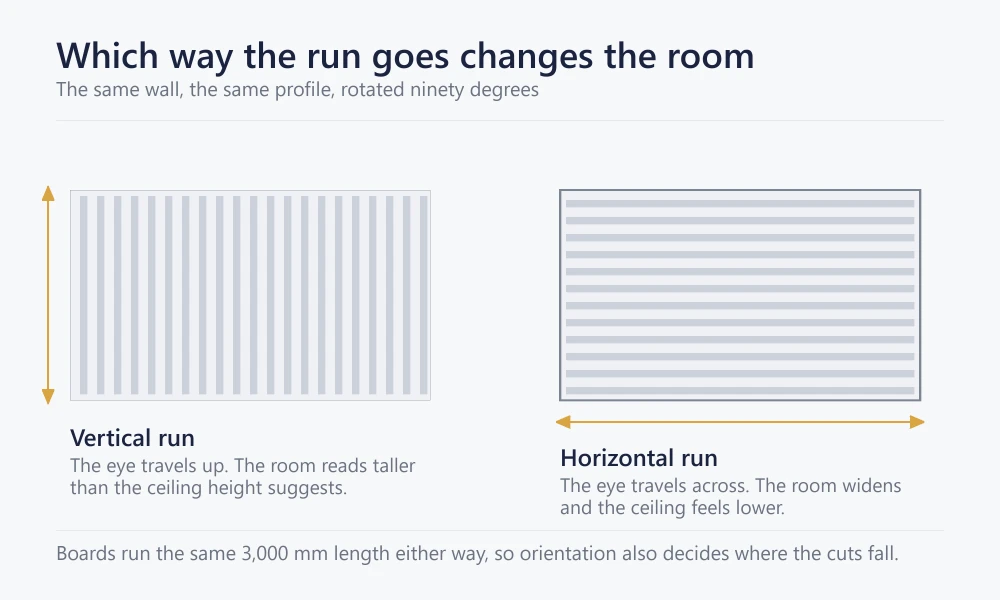
Vertical runs pull the eye upward and make a ceiling read higher than it measures. Apartments, hotel rooms and anywhere with a modest floor-to-ceiling dimension benefit from that, which is why vertical is the default for residential work.
Horizontal runs do the opposite. They widen a space and lower the perceived ceiling, so they suit long corridors, low basements and rooms that feel narrow rather than short. They also demand more care at openings, because a horizontal line that dies into a door reveal has nowhere elegant to go.
Board length is the practical constraint. Our boards run 3,000 mm, so a vertical run in a room under three metres needs no horizontal joint at all. Turn the same boards sideways on a five-metre wall and you introduce a butt joint that will be visible in every groove it crosses.
Fluted wall panel design and the lighting drawing
A fluted wall has no fixed appearance. It has a range, and the lighting decides where in that range it lands.
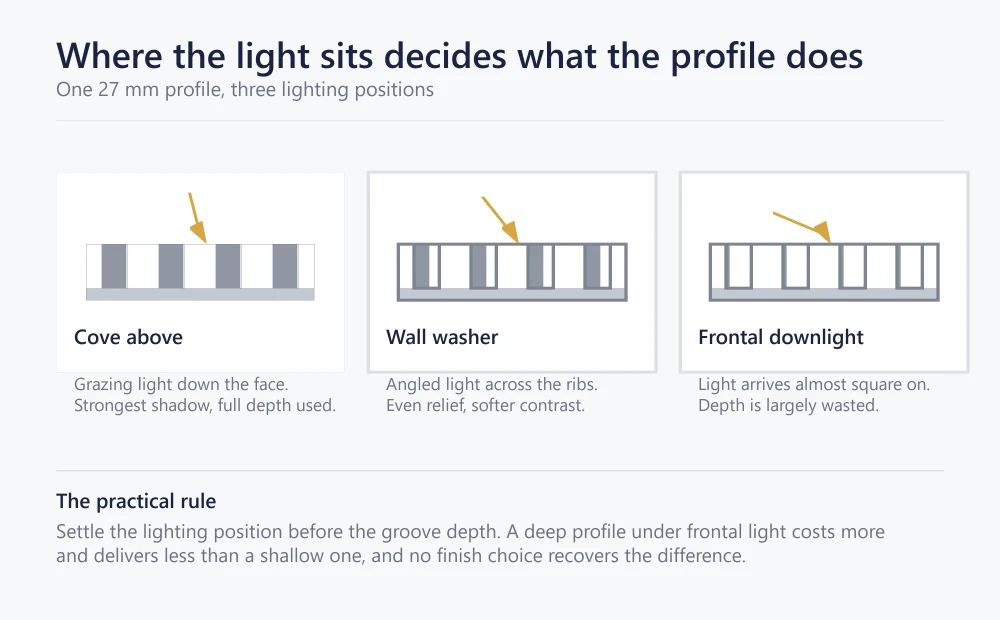
Grazing light from a cove above produces the strongest result, because the beam travels down the face and each rib casts into the groove beside it. A wall washer set out from the wall gives a softer, more even relief. Frontal downlighting square onto the surface produces almost nothing, and a deep profile lit that way costs more than a shallow one while delivering less.
Two coordination points follow. Get the lighting position onto the drawing before the profile is specified, not after, because a wall washer added late can flatten a profile chosen early. And check the throw distance: a cove closer than roughly 150 mm to the wall tends to light only the top third and leave the rest dull.
Colour temperature has a smaller but real effect. Warm light deepens the apparent contrast of a wood-grain film, whereas cool light flattens it and pushes the surface towards grey. Interior lighting levels, glare and uniformity are covered by ISO/CIE 8995-1, which is worth reading alongside any workplace scheme.
How much of the wall should carry the profile
Full-height, full-width cladding is the most common brief and rarely the best one.
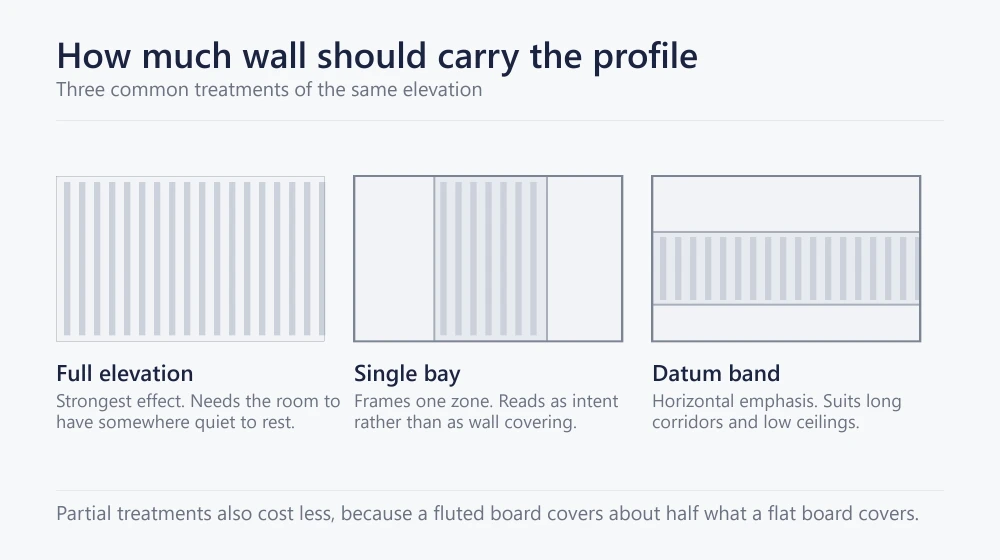
A full elevation gives the strongest effect, and it needs the rest of the room to stay quiet in return. A single clad bay frames a zone, which suits a reception backdrop or the wall behind a bed. A horizontal datum band emphasises length and works well in corridors, although it needs a clean top and bottom edge to avoid looking like an afterthought.
Budget follows the same logic. A fluted board covers 0.585 to 0.615 m² against 1.2 m² for a 400 mm flat board, so a fluted wall takes roughly twice the boards and twice the handling. Cladding one bay rather than four walls is often what makes a scheme affordable.
Material transitions and adjacent surfaces
Where the profile stops is where a scheme succeeds or fails.
Fluted panelling sits comfortably next to quiet materials. Plaster, stone, glass and plain joinery all give the rhythm room to read. Place it beside another strongly patterned surface, such as a bold marble or a figured veneer, and the two compete rather than support each other.
Handle the junction deliberately. Three approaches work: a trim that closes the flutes, a shadow gap that separates the two planes, or a change of plane where the panelled surface steps forward. What does not work is a fluted run dying flush into plaster, because the open groove ends announce themselves at every line.
Depth changes the allowance you need. Our 27 mm profile projects further than a standard 3 mm shadow gap can absorb. A deep-relief scheme therefore needs a deeper reveal drawn in, not improvised on site.
Ceilings, soffits and columns
The same boards work overhead and around corners, with two adjustments.
On ceilings and soffits, weight and support spacing matter more than appearance, so the shallower profiles are the usual choice. Our 12 mm board is the thinnest we extrude with grooves, which makes it the natural ceiling option where every millimetre of projection is being counted.
Columns are where fluted profiles earn their keep. A square column clad on four faces reads as a single sculpted element rather than as four flat panels, and the vertical rhythm exaggerates the height. Plan the corner treatment first, though, because four external corners on one column means four trims and four chances to get the alignment wrong.
Curved and faceted surfaces
Fluted boards do not bend by design. Treat any curve as a detail to draw rather than a property to rely on.
Two routes exist. The thinnest profile can sometimes follow a gentle radius, since a 12 mm board carries less material than a 27 mm one. Confirm the achievable radius with the supplier rather than assuming it. The more reliable route is faceting: narrow boards fixed as a series of straight segments around a curve. Our 125 mm slat board follows a faceted curve more closely than any fluted board, because the segments are shorter.
Either way, the lighting has to be checked again. A curve moves the angle between the light and the face continuously, so a profile that reads well on the flat can go dead halfway round the bend.
Finish strategy across a scheme
Because the film is laminated after extrusion, finish and profile are independent choices. That freedom needs discipline.
Restrict a scheme to two or three finishes at most. One reliable approach uses a wood-grain film on the fluted elevation and a quiet neutral on the flat surfaces around it. Trims then come from the same code as the panels. Adding a fourth finish usually reads as indecision rather than richness.
Tone affects how the profile is perceived. Dark films compress the difference between rib and groove, so the wall reads as depth. Pale films widen it, so the groove reads as a distinct line. Choose the tone for the effect you want, then confirm it under the actual light rather than under showroom lighting.
One accessibility note for circulation routes. Very dark cladding in a corridor reduces the visual contrast between wall and floor, which matters where a route is used by people with limited vision. ISO 21542 covers visual contrast requirements in the built environment and is worth checking on any public project.
Detailing the edges and stops
Every free edge of a fluted run exposes an open groove. Edge profiles therefore belong in the design package, not in the installer’s van.
Four conditions cover almost every scheme. An internal corner joins two clad walls. An external corner turns a clad wall outward. An end cap stops a run against a plain surface, and skirting and cornice close it at floor and ceiling. Our matching profile range runs in the same films as the boards, which is what keeps a cornice from reading as a near miss.
Draw the setting-out at design stage too. Starting a run at one corner usually leaves a narrow offcut at the most visible end. Setting out from the centre pushes equal cuts to both edges, where a trim covers them.
Common fluted wall panel design mistakes
- Choosing depth before the lighting. The most expensive mistake in the list, because it cannot be corrected without replacing the panels.
- Cladding every wall. A room with no quiet surface has nothing for the texture to contrast against.
- Ignoring viewing distance. A fine pitch specified for a wall seen from ten metres reads as flat grey.
- Leaving the edges to site. Open groove ends are the clearest sign that a scheme was drawn but not detailed.
- Mixing too many finishes. Two or three carry a scheme; five make it look unresolved.
- Forgetting the joint. On a horizontal run above three metres, plan where the butt joint lands rather than discovering it.
- Specifying dark panels in a dim corridor. The rhythm disappears and the contrast problem appears.
Frequently asked questions
What makes good fluted wall panel design?
Matching pitch and depth to the room size and the lighting position. Cladding enough wall to make a statement, while leaving the room somewhere quiet to rest. Detailing every edge before the boards arrive.
Should fluted panels run vertically or horizontally?
Vertically in most residential work, because it makes a room read taller and avoids horizontal joints under three metres. Horizontally where a space needs widening, such as a long corridor or a low basement room.
Which profile depth suits a small room?
Usually a low profile. Deep relief in a small low room reads as a heavy dark mass rather than as rhythm. It also loses floor area on a projecting wall.
Can fluted panels be mixed with flat panels?
Yes, and it is one of the more reliable moves available. Running a fluted feature elevation against flat boards in the same finish code gives contrast in texture without introducing a second colour.
Do fluted panels work on ceilings?
They do, usually in the shallowest profile because weight and projection both matter overhead. Check the ceiling structure and the fixing method before committing.
How do I stop a fluted run against plaster?
Use an end cap trim, a designed shadow gap, or a deliberate change of plane. A fluted board that simply dies flush into plaster leaves open groove ends along the whole junction.
Final perspective
Good fluted wall panel design is mostly a sequence. The room sets how much texture it can carry. Viewing distance and volume set the pitch, the lighting sets the depth, and only then does the finish matter. Run that sequence backwards, starting from a photograph of a finish, and something usually has to be undone.
The detail that separates a considered scheme from a competent one is where the profile stops. A clean junction against plaster, a matching trim and a considered setting-out cost nothing at drawing stage. None of them can be retrofitted afterwards.
If a scheme is on your desk now, browse the fluted and slat range or talk to our team about a project. For a specific room type, our guide to living room and media wall schemes goes further, and choosing a fluted profile covers the specification decisions.